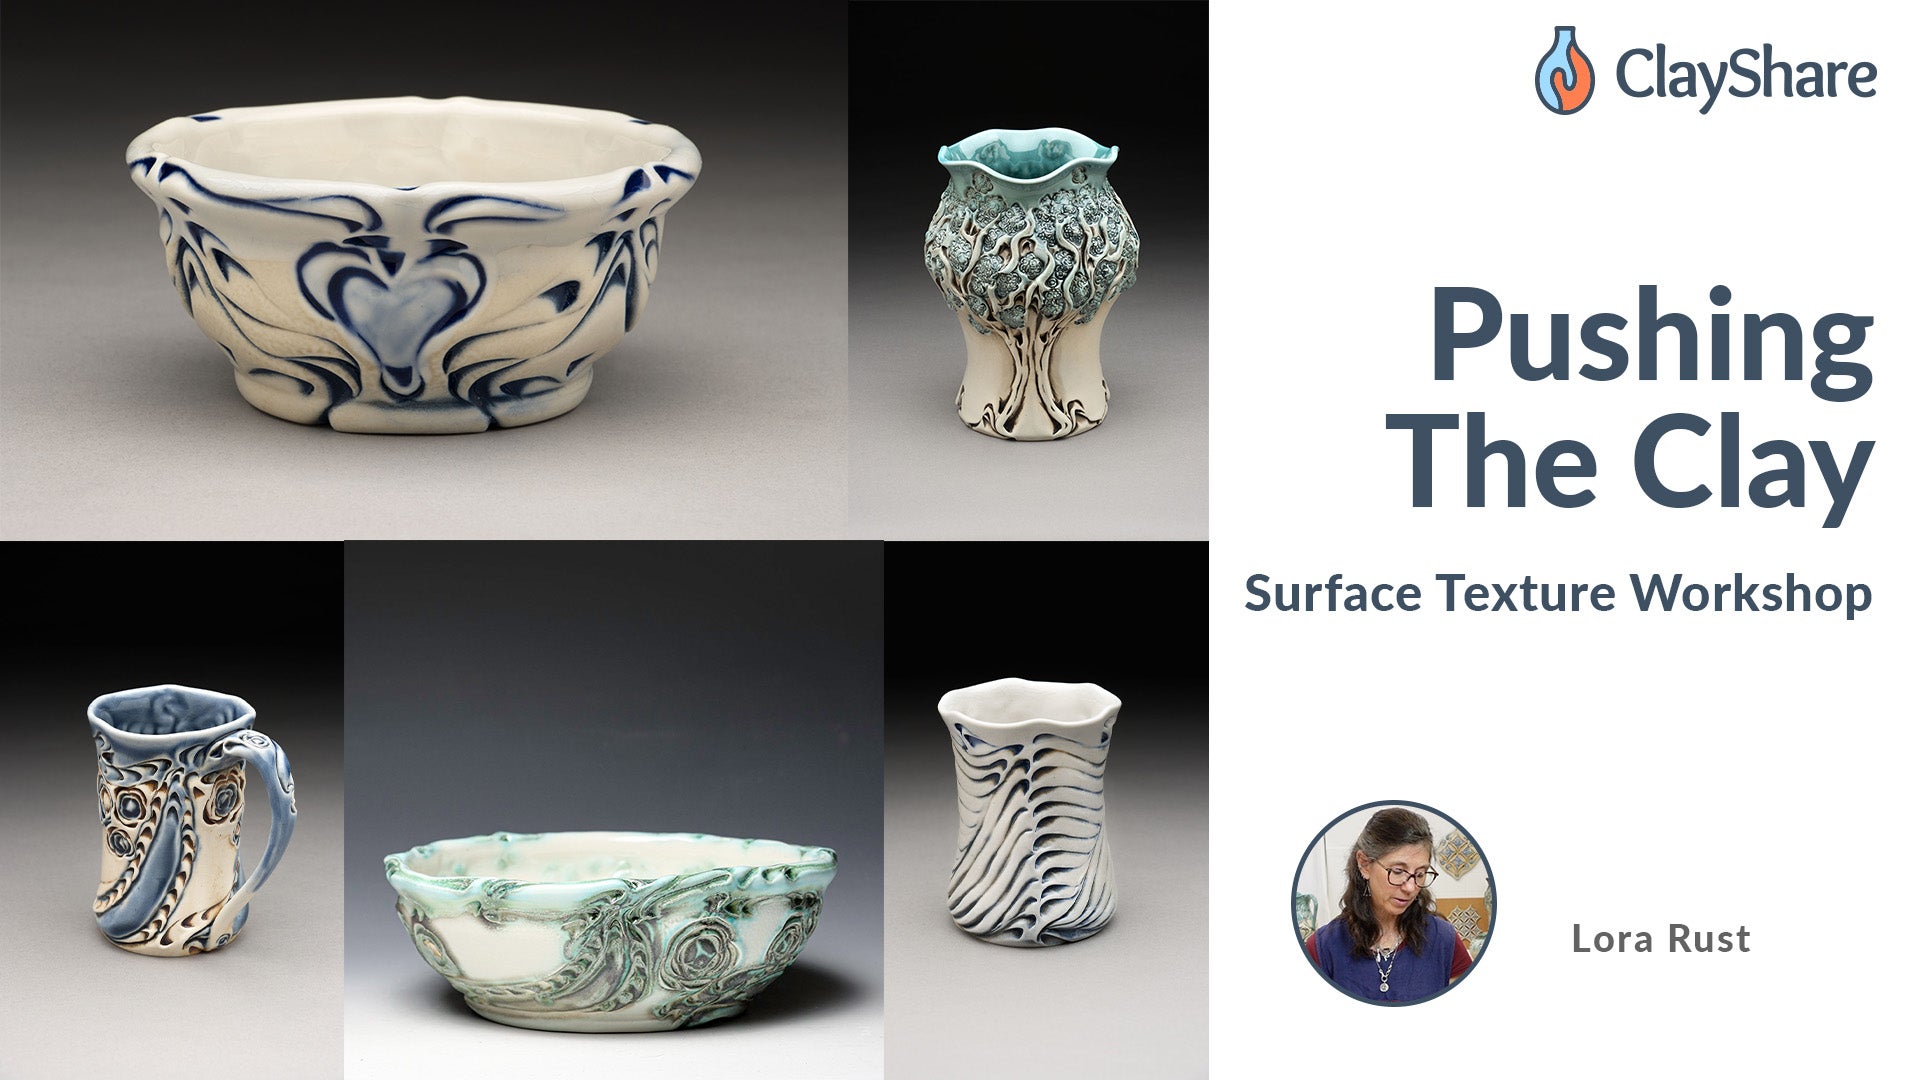
It's all about the texture in Lora Rust's workshop! For hand-builders and wheel-throwers, learn Lora’s unique pushing the clay process and create unlimited designs using her Texture Tool Kit (purchased separately at LoraRust.com).
2 sessions will cover learning the pushing the clay technique, tips on keeping the shape of your piece while manipulating the surface, design shortcuts using a grid and tool contours, and details how to make the texture “pop” when finished.
Week 1 we'll practice using the various profiles of the tools and mastering the "pushing the clay" technique on slab tiles.
Week 2 we'll texture a cup and a small bowl that you've made ahead of time - hand built or wheel-thrown! We'll save some time to talk about glazing. Hope you can join us!
What you'll need:
Pushing the Clay Texture Tool Kit - Purchase directly at Lora's website: 4 tools for with 2 profiles each for $25. Free shipping for workshop participants by using discount code CLAYSHARE .
Non-groggy clay like Laguna B-Mix - Lora will be using Laguna porcelain WC616
1/4" slab cut into approximately 4" x 4" squares - we'll use these in week 1 to practice the techniques and play with designs. Make as many as you want but 4-5 is a good start.
Water bucket
Pottery sponge
Piece of foam approximately 10" x 10" square and 1" thick (upholstery or egg crate foam)- you'll use this to support your piece and your hand while texturing
Hand towel
Inexpensive watercolors and soft, thin brush for marking a grid
Mister spray bottle with water
Banding wheel (optional)
Small flowerpot (optional)
Dry-cleaning plastic or plastic grocery bag
Concentric marking grid (provided)